12V accessory outlet #2 – the connection

If you read my fairly recent post on the AG200 12V accessory outlet, you may recall me mentioning that I would discuss my recommended method of connection to the accessory plug in a separate blog post? Hereth the separate post! So read on folks to discover what I do to connect up the wiring to the AG200’s 12V accessory outlet…

To begin, please respect my right to be a lazy bludger (it might have something to do with it being new years day as I write this!) and quote a section from the previously mentioned post;

“So what’s involved with hooking something up to this thing…what do we need? I figure I need to do a whole separate blog for this procedure because I have seen these plugs bodged up so bad. Most of the time the protective rubber boot is just left off and/or bare wire is looped around the terminal screw of the plug and left at that! Possibly the main problem lies with standard automotive crimp lugs don’t fit under the boot when they are screwed to the terminals. The terminal screw size is M3 (3mm) so a decent terminal that can fit under that boot is not exactly mainstream, especially since the said terminal (a good one!) requires a special tool to crimp it.”

What’s so special about the lugs (henceforth called ring terminals) I’m recommending here? Once again I’m going to let new years day lethargy kick in and (if you’re interested) flick you off to a website that will allow you to go deep into wiring for motorcycles. Check out Cycle Terminal and you can learn all about best practice currently (for the home hack!) in this field. This site will, specifically, tell you all about open barrel crimp connectors. After you get through all this info you may notice a problem; the screws on the AG200 accessory plug are metric M3 items and there are no M3 ring terminals you can buy on this site. Not their fault of course as I must admit I haven’t seen anything as small as M3 used on any bike electricals in my travels. But I have seen them used in general electronics use. In fact M3 stuff is used quite a bit in electronics, especially the electronics I’ve been involved in.

M3 ring terminal

What we need is some non-insulated, open barrel connectors in a M3 ring terminal (crimped). Bit of a mouthful huh? Have a close look at it in the photo here, you will see an innovative design where there are two separate crimp components of the terminal; the section close to the ring that clamps the copper cable that makes the electrical connection, and the second part that clamps the insulation to form a strain relief. Both of these sections fold over their respective cable section and pinch them tight. You won’t find them (these M3 ring terminals) at your local automotive outlet or even the run-of-the-mil electronics stores like Jaycar or Altronics in Australia. You may need a specialist electronics supplier like Mouser or Digikey, and they may have a minimum purchase of 6000 (Mouser) of them! Bit beyond the average AG200 punter eh?

The two crimp sections on these terminals have to pinch over in separate diameters, so you need a specialist crimping tool to do it correctly. And yes, the correct crimping tools can be expensive and I have found (like most things in life) the quality of the connection is proportional to the money you spend on the tool for the job! The crimping tools can range from $30 for a cheap one (most will have to crimp the terminal in two separate actions) which will wreck more terminals than it will terminate, to $300 and up for one that works well.

Of course having said all this, there still will be the age-old debate on whether to crimp or solder and in my early days as a technician I was defiantly in the solder-everything camp. Then I got a job in the two-way radio field where I saw the effects of soldering terminals in harsh environments. The issues I continuously saw (and had to repair) in my day to day work was the failure of soldered connections even when (rarely) they had some some sort of attempt at strain relief. Solder will “wet” up the multi-strand wire and create a shear point. All the movement whether it was thermal or mechanical based would concentrate at the shear point and eventually the copper would fracture. In extreme cases, the cable/connector termination would only last a few days. A cheap and cheerful insulated automotive crimp would crush (no pun intended) the soldered termination for reliability. This is why you will see no soldering in my recommendations unless the cable resistance is critical and the cable is thick so it can be strain relieved effectively, like high current starter motor cables.

IMG_0610
IMG_0613

At left you can see a crimped set of ring terminals using about 20cm of red and black 18AWG, multi-strand cable. If you look closely at the pic at right with the cables installed on the plug, you will notice I install the ring terminals upside down on the plug terminals, this is to help with the alignment with the holes in the rubber boot when you slide it on. I find it doesnt hurt to bend them towards each other a bit as well which helps it all go together a bit easier. The termination at the end of the pigtails is up to the owner of the AG200 and dependent on the application. The cable I used is rated at 7.5Amps so it is over the rated maximum current of 6Amps and I would highly recommend adding a fuse rated for your device even though the accessory line is fused. If you’re a belt and suspenders type of person then I would also suggest a little squirt of your fav lubricating fluid (WD40, CRC 226) on the terminals before you button them up and maybe a touch of neutral cure silicon on the rubber boot where the cables exit.

And please, please, please, please ***PLEASE*** check the polarity of your plug cables with a multimeter ***BEFORE*** connecting any device to it. Reverse polarity lets smoke out!

IMG_0618

And just to finish, I know what you’re thinking – “who cares AGman! I’m never going to go to all this trouble and expense for an old farmerised bike”. Aaaaaand that’s pretty much what I thought you’d think so I have taken all the work and expense out of it and put some pre-made pigtails up on Ebay. Check them out at AG200_central and you may see me add a few similar leads in the future – maybe with a weather-proof fuse holder and a few other options I’ve been thinking about depending on how popular this item is. Have any ideas? Let me know in the comments.

Cheers & Happy New Year!

AGman

P.S. Like my content? Has it helped you out with your AG200? If it has provided value to you and you would like to help me to continue adding content and information, check out my About/Donate page for info on doing just that! Thanks to those that contribute.

Camshaft Bearing Upgrade

I know what you’re thinking; Oooooh…hot performance mods from AGman! And you would be wrong. This is not a performance mod, it’s a “How Yamaha should of done it” mod. The fact that it makes the AG run a bit nicer is just pure coincidence. Well sort of…read on and you can decide.

So what’s the point of this modification? A mechanical minded person never likes seeing things done second rate. Corners cut just to save a few bucks and to hell with the inefficiencies it creates for the machine and customer. Unfortunately, the machines we use today are full of these bean-counter-induced short cuts, so when you see an easy fix or upgrade to a machine you want to go ahead and do it right? I do anyway!

Ag200 cam bearingIf you have spent time on these engines, you may know this cam bearing is a suspect area of the top end. When you pull it out it’s nearly always worn and is usually the first thing to seize up when there is an oil supply issue, not that this is a bad thing – better than a crank I suppose! Think of it as a sacrificial anode! I just look at this big chunk of aluminium and wonder why they couldn’t install a proper roller bearing in it? So anyway, in the real world I guess you could say this mod reduces a bit of friction and maybe a bit of unnecessary oil heating in the head.

So this mod probably achieves very little, maybe the satisfaction of the owner knowing he has gone the extra mile in machine-love for his bike! It does run a bit quieter I have noticed. There is a funny hiss sound from the head with the old, solid bearing that seems to disappear when a nice shiny roller is chucked in so that is about all you will see in real world terms I guess. But hey, this hasn’t stopped machine owners doing stupid, pointless upgrades for over one hundred years so lets get on with the procedure!

AG200 camshaft rollerThe bearing itself is nothing special. A generic 6005 is the part number and most manufacturers make them. There are a few issues that makes me decide which one to go with though. A lot of guys on the TW and XT forums slap any old bearing in and it seems to work fine for them – that’s great. But I stopped and contemplated the issue for a bit and the following is why I chose the bearing type I did.

AG200 cylinder oil pathNext time you get the chance to have a look inside your AG200 cylinder head, take note of how Yamaha designed it. The length of the cam runs in a channel that acts as a bath of oil. I suspect this is significant in its design and think it’s critical to how Yamaha engineers intended the oil to move around the head to do its job. The oil pressure of the AG200 and its derivative engines is not particularly high so I’m not sure if the sole oil supply to the head (the largish holes from the spinning camshaft) are the only intended means for getting the oil around all the mechanical parts in the top of the engine. Maybe a bit of help from a spinning camshaft half submerged in a bath of lubricant was intended to get the oil where it needed to be as well? The rockers are splashed lubricated and sit above the cam so the oil has to get up there some way.

Where is all this leading AGman? Stop waffling and get to the point. OK, so my question is; what if I go gambling with this system by putting a standard, open cage roller in place of the solid aluminium bearing? See where I’m coming from? Will the oil flow out through the bearing rather than stay in the “bath” and do the job it was designed to do there? Another thing to consider is where the oil will go when the engine is shut down and put on the side stand? The engine is leaning over on the side of the bearing and the oil will drain out of the channel between the bearing ball races. Will this effect top end longevity in the long term because the head is drained of this instantaneous protection at start up?

Irrespective of it effecting things, I decided not to chance it and go with a metal shielded 6005 and remove the shield from one side. The oil will see the same thing as the old bearing and oil flow may be effected marginally.  What about ratings? If you have been out and about on other forums and blogs, you would of read people talking about using C3 or C4 bearings in their bike engines. What’s this all about? There are other ratings that can be an issue with using certain bearings in gearboxes and other different parts of the engine, you can do a search and dig deep into this field if you want but I leave it up to the bearing sales person. Tell them what the application is and they should be able to point you in the right direction.

So basically, go to your bearing shop and ask your sales person for a metal shielded, 6005 bearing for use inside an engine. The part numbers on the bearings I have used are NSK 6005ZZCM and SKF 6005-2Z. The first thing to do when you get home is open up your nice new shiny bearing and use a sharp but strong tool like a pick or scribe to hook into the steel shield on one side of the bearing and bend it so it pops out. Now we have the bearing stuff sorted, lets get into the fitting part.

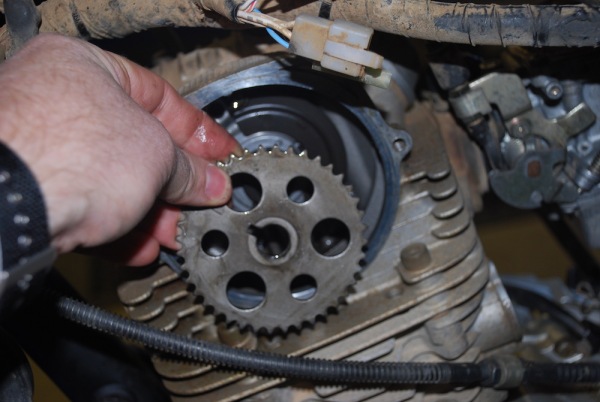
AG200 remove cam gearMost of the information you need to install the bearing is in my Cam Chain replacement blog that I wrote up a few years ago. There are a few things to watch out for which I will cover here. In that post I didn’t get to show how to remove the camshaft because you don’t have to for chain replacement, but for this procedure you do. If you are careful with the cam chain you won’t have to remove the left side engine cover like you do to replace the cam chain either so this is a simple and cheap mod to perform if you have the Jedi skills! You will still have to remove the tensioner and and make sure the engine is at TDC on the compression stroke, as described in the above link.

AG200 cam bearing remove2Remove the bolt from the top cam gear and remove it and secure the cam chain so it gets pulled up (not shown in my photos) and there is tension on it so it doesn’t fall off the bottom crank gear. A rubber bunjy strap or cord works well doing this, just hook it over the frame or some other solid part of the bike. Then you need to remove the two 10mm, M6 bolts holding the bearing retainer in the head shown here at right.

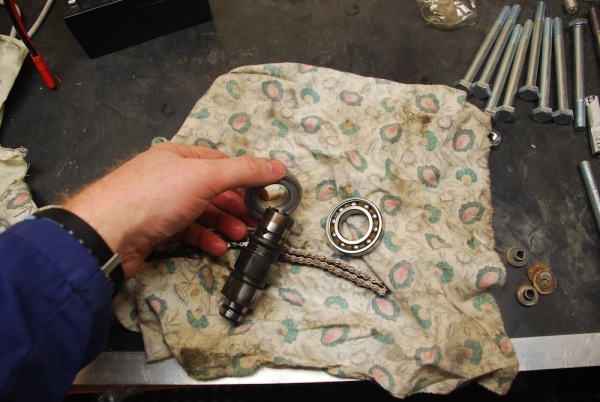
AG200 cam bearing removeAfter the retainer is removed the cam and bearing assembly is free to be slid out of the head. Just another reminder to get the engine at TDC on the compression stroke so no valve springs are putting pressure on the cam lobes. In the picture at left you will notice I have inserted the cam gear bolt back into the camshaft to help with pulling out the assembly. It should slide out with minimal pressure.

AG200 cam bearing swapOnce the assembly is on the bench, it’s pretty strait forward to drop in the new bearing. The old alloy fork seal installer will slide right off and your new roller bearing can slide right on, with the remaining metal cover of the bearing facing out – check the pics below. The clearances are pretty good so cooling or force shouldn’t be required in heavy doses for this procedure.

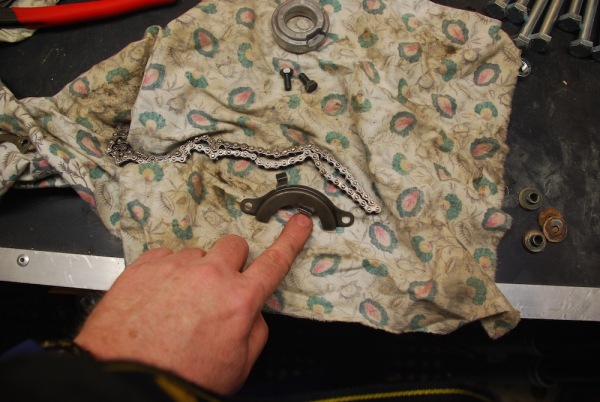
AG200 cam roller onNow you can slip the assembly back into the head. When reinstalling the Bearing retainer you will notice the slight issue of it not fitting anymore! This retainer was used to stop the old alloy bush from moving in the head in two dimensions – spinning in the head in the same axis as the spinning cam, and sliding out at 90º to the axis of rotation. It will now get re-tasked to do just the later but it will need be modified to perform this task.

AG200 cam bearing retainerWith the cam and bearing assembly re-installed back into the head, make sure it is pushed in as far as it can go. We now need to adjust the inside tang on the retainer that my nail bitten digit is pointing to at right. There is a problem in respect that the tang will sit on the steel race cover which is probably not ideal but the rest of the retainer will hold the bearing in OK if adjusted correctly. I bend the tang so it just touches the race cover and I have had no issues or failures after installing plenty of these bearings.

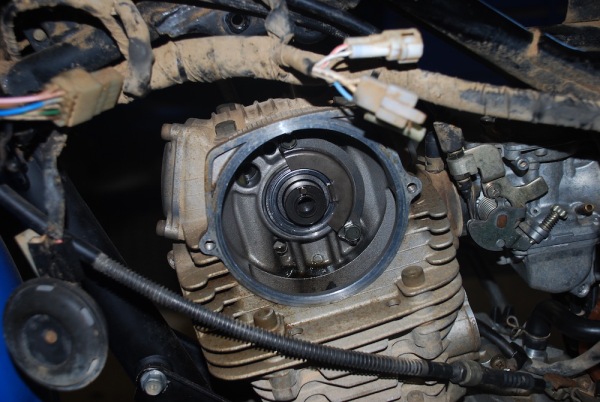
AG200 cam bearing installedReassemble the engine taking particular care to get the timing right, if you don’t know how to do this there is plenty of information in the manuals that I have linked to on this site. You may want to do the valve clearances while you have handy access to everything here as well, once again the info is in the manuals.

Long time TW, XT & TTR owners will probably just say that I ripped this idea off their respective forums right? Wrong, I got the inspiration for this mod from fixing Yamaha YFM400 ATV engines many years ago. They have a bearing on the camshaft and it got me thinking, I tried it, it fit in the AG and here we are…a nice, simple and cheap upgrade that you can try one day when you have nothing better to do!

Regards

AGman

P.S. Like my content? Has it helped you out with your AG200? If it has provided value to you and you would like to help me to continue adding content and information, check out my About/Donate page for info on doing just that! Thanks to those that contribute.

AG200 parts suppliers, part #2

As a continuation of my service to provide up-to-date AG200 parts information for all my loyal and fanatical readers, yes all four of them (Hi Mum! 🙂 ),  I thought I would put fingers to keycaps to jot down a bit more info that I thought might help out the fellow AG200 journeyperson. This may save you a bit of coin (in some cases a lot) and may point you to a reliable source to help you out when you are restoring or just doing basic maintenance on that old AG200 sled of yours.

Yam parts

Are you a bit of a genuine parts snob like me? Have you seen that glorious red writing on a sticker in an Ebay sale promoting Genuine Yamaha Parts and Accessories? Is your mouse pointer hovering over the buy it now button? Here’s a bit of friendly advice; Don’t! Not until you have done a bit of research anyway. You might be a bit surprised at the gouging you might be getting from your friendly Ebay parts supplier.

Admittedly, they may not even know what they’re doing due to the fact that a lot of Ebay parts are individuals who have purchased a bulk lot of “New Old Stock” parts from a dealer or a failed business. They may have no idea what they have or what it’s worth. But who cares right? This is not about them, it’s about us! The poor bugger at the pointy end of a AG200 that needs some lovin’! Get your virtual self off to Trouper Lu’s Garage and use their online parts list to check if you are better off just buying new parts. I have seen stuff on Ebay that is twice as much as listed at Troupers!

Full disclosure if you are wondering; I have nothing to do with Trouper Lu’s, but I have purchased parts off them and they are fast and have pretty good stock. They are one of the few Australian Yamaha dealers that have invested in getting their spares online like most of them in the USA and I salute them for that, my guess is it was a big commitment. I’m a bit of a weirdo like that…I have been on the other (wrong?) side of the counter and it takes commitment and passion to differentiate yourself from your competitors and if I see it, I support it.

But not everyone is a weirdo! I’ll admit that Troupers is not the cheapest in the country for parts so you could shop around if you want but I’ll let you in on a little observation that I noticed not long after Troupers got their parts up online; I was buying parts from a dealer in Melbourne (still do) and noticed that they were a bit cheaper than the Sydney based Troupers mob, but prices crept up after that. Did everyone up their prices to match them after they could see their pricing? I wonder…

But again, who cares! Share the love if you have a local dealer or you could spend over $50 at Troupers and get free freight! I get my stuff from all around the place depending on where the planets are so feel free to spend money where you see fit. Just keep those Ebay sharks honest though!

Cheers

AGman

P.S. Like my content? Has it helped you out with your AG200? If it has provided value to you and you would like to help me to continue adding content and information, check out my About/Donate page for info on doing just that! Thanks to those that contribute.

AG200 parts suppliers.

I get asked a lot about where to get parts for the AG200. Everyone knows that Yamaha parts are expensive in Australia, but so is everything else right? Our strong, unionised workforce and accompanying high minimum wage is the price we pay right? You have to pay to play right? RIGHT?! Lets take a closer look…

OK, so the hard numbers first. A few posts back I did a write-up on a basic, top end rebuild and the parts that are required. As a service to my beloved readers (actually it was for a farmer who reached the “service interval” of his bike! 🙂 ) I went out and purchased these parts from my local Yamaha dealer.

1NU-11181-00         GASKET, CYLINDER HEAD 1  – $21.51

90430-14131            GASKET  – $14.10

93211-45471            O-RING  – $17.35

93210-57634            O-RING x 2  – $9.00 each

93210-72529            O-RING  – $14.30

5LB-11351-00           GASKET, CYLINDER – $8.05

93210-13361             O-RING  – $1.90

5H0-12119-00           SEAL, VALVE STEM x 2  – $6.60 each

93210-09165             AA5 O-RING – $2.60

4BE-15451-03          GASKET, CRANKCASE COVER 1  – $15.25

93210-14369            O-RING  – $4.50

93210-32172            O-RING  -$4.15

94580-41104            CHAIN (DID25SH 104L) – $77.70

4FM-1 2213-00        GASKET, TENSIONER CASE  – $1.30

15A-11603-00          PISTON RING SET (STD) – $71.70

93450-17044            CIRCLIP x 2  – $3.90

So the total for the above parts in Australia for a basic, top-end overhaul for an AG200 comes to $289.51. The same sixteen line items for a 2017 TW200 from Partshark in the US is $164.31US. So if you do the conversion at the time of writing, it comes to $216.89 in AU dollars and then you have to freight it out here. So if the freight is around $50 AU you can see that it pretty much doesn’t add up to get it from the US. I don’t think it is anyway.

Even back in the days not too long ago when the US and AU dollar was close to parity, I was noticing a disturbing trend from the few things I was getting from the US but particularly from a lot of my acquaintances and other Australians that I had contact with on forums. People were getting the wrong parts or even broken ones. Were unscrupulous US companies/parts guys using us as a dumping ground for all their crap parts and products? My experience was yes, yes they were. They knew we wouldn’t send them back, we are not value Nazis like the average US shopper and even if we were, we were not going to wear the freight to send it back over the pond anyway! I wonder how many second-rate or wrong bits ended up on Ebay over here because of this?

I lost interest in ordering a lot of parts direct from the US after noticing all this, while the strengthening of the US dollar and a price reduction on parts from Yamaha Australia helped to close the gap anyway. So my recommendation is to make sure you do the math before you go ordering stuff from the US, it’s not worth it any more in my opinion, not for one-off rebuild parts anyway. If you are going to buy a heap of one part then it may be a different story.

So what do I recommend for us Aussies? Shop around! A lot of dealers did not pass on the Yamaha price reductions from a few years ago so you might find a fair bit of variation for the sake of a few phone calls. Here’s one trick you can try; ask for a price on the good old NGK D8EA spark plug for the AG200. Who ever is cheapest for this simple part will usually be the cheapest for everything. Why? Because most (not all) dealers usually set a margin for their parts in their accounting software that covers all their stock (if they have a computer, I know dealers who still don’t!) so if they are cheapest on this easy to remember, common part then they usually are across their whole stock of bits.

What about after-market bits? The big one in my list above is the cam chain. A good quality DID or RK chain can be had for half the price of the one listed above. The rest…well I have always liked genuine Yamaha parts and as ridiculous as the prices are for for some of the o-rings listed here, not all rubbers are created equal. I get using generic, bearing shop o-rings (I still wont use them though) for the external, easy to replace parts like the rocker covers and top timing gear cover o-rings but the internal ones? Don’t do it unless you are a materials engineer who knows what heat and hydro carbons do to the materials you are going to use!

How about after-market gaskets? Same deal for me, I go with genuine but I’m sure there are good after-market options out there, you just have to troll forums and see what people are using and have had good results with. It is an area that I should look into more and try some variations.

So bottom line for me is shop local. I have been on the other side of the counter and it is a tough gig these days. With the pitiful margins on bikes and with the floor plans the manufacturers impose on their dealers, I wonder how they (particularly the smaller ones) survive. So help them out if you can, ask them for a discount – they can only say no and you may be helping them keep their doors open for your future convenience!

Cheers

AGman

P.S. Like my content? Has it helped you out with your AG200? If it has provided value to you and you would like to help me to continue adding content and information, check out my About/Donate page for info on doing just that! Thanks to those that contribute.

Changing a timing chain. Part#1

AG200 bent inletDoes this AG200 inlet valve look a bit wonky to you? It should…it’s been smacked by a piston! This is what WILL happen if you neglect your timing chain. It’s all easily preventable though and the bike tells you when it needs changing. The diagnosis and remedy is all pretty straight forward. Lets have a look at what’s involved.

First the diagnosis…does the timing chain need changing in your AG? There are a few components in the AG200 engine that, in my opinion, are marginal and can wear out quickly if neglected. The timing chain is one of them. It was upgraded to a stronger assembly on some of its sister engines and that suggests to me that it was borderline, and Yamaha knew it. Consequently, I tend to be overly cautious of its maintenance and replacement regimes and as with most engine components, oil changes are its biggest life-extender.

So replacement time is pretty simple; if you can hear the chain rattling around in your engine (preferably when its running!), it needs replacing. That’s how I roll with the timing chain in the AG200 anyway. The chain can be had for $20 and with an oil change and a few gaskets you’re looking at around $50 or less for this preventive maintenance. That’s a lot cheaper than leaving it until it spits the dummy! If you have a second hand bike that has missed a lot of owner love then you can keep an eye/ear on it and replace it if it’s noisy. Once you know its been renewed keep fresh, quality oil in the engine and it will repay you with good reliability.

AG200 timing chainIf you neglect oil change intervals and ignore the death rattle coming from within the engine, eventually the chain stretches and the tensioner will not be able to do it’s job of keeping the chain on the sprockets. Before it finally chucks the teddy in the dirt, in an act of defiance the timing chain will slap around, grinding into the inner walls of the head and cylinder (see pic at right), showering the engine internals with alloy swarf before finally flinging off and causing grief proportional to the RPM you’re doing at the time. If left to these extremes, it will cause issues down the track by spreading metal around the engine. The 3GX is a tough old lump, but no engine likes metal in it even if it’s soft metal.

Please, please, pleeeease don’t think you can extend the tensioner shaft! Yes, a lot of people on-line say you can extend the “service life” of the timing chain by adding some length to the tensioner shaft that puts the pressure on the chain guide. You can buy a new chain for less than $20 and one, maybe two gaskets and the head or cylinder doesn’t need to come off to do the replacement. Why would you bodge it up like this? When the chain starts to rattle, its worn out. All it does now is start to wear the timing gears which are not listed as a replacement part on the crank end. So if you wreck this gear you wreck the crank. Don’t be a hack, spend the 20 bucks!

OK, so lets get into it…this is what you’ll need;

TOOLS; 8mm hex socket (or Philips for the older bikes), flat blade screwdriver for timing/flywheel bolt covers, 17mm socket, extension and square drive for the flywheel bolt, Flywheel puller (M16 x 1.2mm), Flywheel holder.

PARTS; 104 link timing chain, stator cover gasket, timing chain tensioner gasket, oil.

Kick your bike in the guts (Aussie speak for start it up!) and warm it up (you haven’t let the timing chain fling off have you?!), shut it down and drain the oil out. A general service is a good time as any to do this timing chain job so clean the filter and dispose of the oil. When you’re done, stick the drain cap and filter cover back on and nip them up.

WAIT!!! Stop! Sorry to be so dramatic…but before we go any further, when you do change your oil, check your oil filter and mesh strainer for any signs of black plastic chunks. If there is any black rubbish in there I’d say your timing chain tensioners have gone brittle and are starting to fall apart. This is a sign of pretty serious neglect though so it’s not that common to see. If you do see it then you wont be able to do this job without taking the top end off to replace the tensioners which I will cover in an up-coming blog. Its not that common to see but I thought I’d mention it at this point in the disassembly.

OK, the tensioners are fine and we can continue with the chain swap. Every major (or even minor) maintenance job on a motorcycle should start with a good clean. Not only paying attention to the areas that will be worked on, but the whole bike really. Pull off the tank and seat and scrub it all up. Rubbish likes to accumulate up under the tank around the wiring looms and on top of the head and just loves to fall down into your opened up motor!

We have a section that we need to pay particular attention to with this procedure – the front sprocket area. If we don’t get this area nice and clean before we remove the stator/flywheel cover, all the rubbish that will be in behind there will try its best to get inside the motor. So turn your attention to the front sprocket cover. Remove the gear shift lever by removing the 10mm hex head bolt and sliding the lever off it’s spline. Remove the two Philips screws holding the rubber cover to the plastic sprocket cover. Two more bolts are required to remove the front sprocket cover.

DSC_0045You will now have access to the front sprocket area to get it as clean as you can. Take your time and actually, if you have a pressure washer, now is the time to put it to good use. Otherwise, pry out as much rubbish as you can with a pick or screwdriver and finish off with de-greaser and a stiff brush. Removing the drive chain and front sprocket will make this job even easier. The pic. at left shows a partially disassembled bike but it will give you an idea on how clean it should be. The wiring in the photo is also relevant as we get into the job.

AG200 top timing coverRemove the two bolts that hold the top timing gear coverStator cover. Early bikes had Philips screws while newer bikes stepped up to 8mm hex heads. When the bolts are removed you can take off the cover and view the top timing gear. Next job is to remove the two inspection caps on the stator cover. The small upper one is to give you visual access to the timing marks on the flywheel while the larger, lower one allows you to get access to the flywheel bolt so you can rotate the crankshaft.

AG200 timing markRemove the spark plug and insert your square drive socket into the flywheel bolt hole and rotate the crank so the timing marks line up. The flywheel mark can be seen at left and you can see the other one in the above photo of the top timing gear. The mark on the gear should line up with the pointer cast into the head right at the top of the gear housing. You don’t have to get too pedantic with it all at this point, the reason I do this first is to get any tension off the valve assembly so when you start undoing bits it wont fly off everywhere because the cam is sitting up on a compressed valve spring.

AG200 stator cover offI would now take the opportunity to loosen off the top cam gear bolt. Use your square drive socket to hold the flywheel steady while you get another 17mm socket or spanner onto the bolt holding the top gear to the cam. Get it loose and leave it alone for now, we will come back to it.

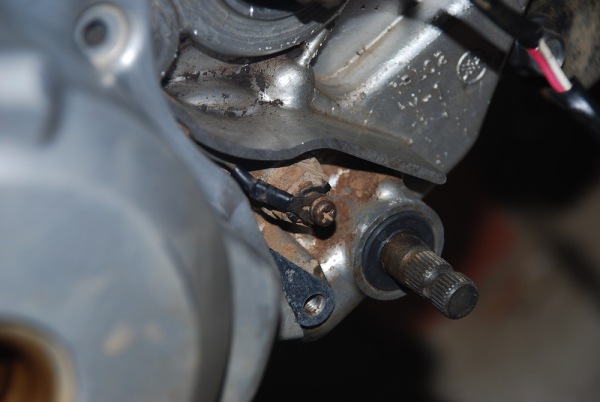
AG200 neutral wireNow the eight stator cover screws (for later, electric start bikes) can be removed and a light tap on the cover with a soft faced hammer might be needed to jar the cover free from an old, hard gasket. Once you have the case loosened off, have a look at the wiring going to the stator cover and work out if you want to disconnect the connectors from the loom or have something handy for the cover to sit on close to the bike while you are poking around on the engine. I like to disconnect the wiring and remove the cover completely from the workspace but it’s up to you. Take note of the neutral switch wire which also needs to be removed, shown at right of this paragraph.

Be aware that there will feel like there is resistance when you pull on the cover because of the magnets in the flywheel trying to hang on to the steel coil formers of the stator. Just be careful especially if you have left the wiring attached. Also take note of the two locating dowels in upper and lower rear screws of the case. These dowels like to fall out and go missing at times! Download the manual and check out the (p. 121, ref. 4) diagrams if this is all getting confusing.

DSC_0031When the cover is off you will see the flywheel…which now has to come off. But before we do this we need to remove the starter idler assembly as shown here at left. Remove the aluminium washer in front of the gear (just behind my finger and thumb in the pic) and slide out the shaft and you can then remove the idler gear. Now we can remove the flywheel. This is a really easy job for me because I have a cordless impact gun! Getting flywheels off used to be a real chore when I was a kid. Getting the nut/bolt off was hard enough and then removing the flywheel without a puller was always an adventure! Doing things to engines that make me shudder now!

flywheel & pullerThese days with the correct tools, this job is a snap. With a puller and a rattle gun, I don’t even require holding the flywheel with the removal procedure. Releasing the retaining bolt and flywheel from the crank are both quick and easy compared to trying to do it with spanners or square drive tools. At right is a picture of an example of a set-up you could use if you don’t have a rattle gun. It shows a holder and the flywheel puller installed ready to pop off the flywheel. There are a few variations of flywheel holder tools and this photo is kindly supplied via “SpudRider” over at China Riders Forum and is showing the procedure on his Zongshen GY-2 which has a very similar engine to the AG200. How you get the flywheel off is ultimately up to you. Buy, beg or borrow the correct tools to do the job or you will have to resort to bashing things which normally never ends well!

When you come to the part of actually sliding the flywheel off the end of the crank, try and remove the flywheel and the starter drive gear off as a set. The starter drive gear behind the flywheel can get hung up and stay on the crank and if this happens all the springs and rollers for the starter drive (Sprag Clutch) will fall out and you have to reassemble them, no big deal but it will make life easier for you if you can remove it, and keep it all together as a set.

OK, so you got the flywheel off. Check the manual again (p.123) to see what else you need to keep track of. There is a woodruff key (ref.4) that may or may not dislodge from the crank and a washer or shim (ref.6) that sits behind the flywheel that may or may not stay on the crank. Watch what happens to these items.

DSC_0007Put the flywheel/starter clutch assembly aside and you should be looking at the pic at left. Note that the washer that sits behind the flywheel is still on the crank and the woodruff key has been removed from the crank in this photo.

Lets turn our attention to the timing chain tensioner. First DSC_0042thing to do is loosen the 10mm bolt on the centre post. Don’t remove it, just loosen it for now. Now remove the two Allen bolts at the top and bottom and remove the DSC_0010tensioner from the cylinder. You will feel the pressure that the tensioner exerts on the chain as you loosen the two Allen bolts.

Remove the timing chain tensioner assembly and you will have a nice slack timing chain that you can slip off the top timing gear and let drop down the engine to the crank shaft and lower timing gear. DSC_0013The top timing gear can be removed to help facilitate this – or not. Sometimes the chain will be loose enough that it will lift off the side of the gear and you can just let it drop down to the the crank and remove it.

That’s the removal part done. True to form it was getting a bit long so I will break it up into two parts; removal and reassembly. My only other suggestion before signing off is to jam some rags into the engine cases and clean the gasket surfaces on the engine side and stator cover ready for reassembly.

Keep an eye out for part two…

Cheers

AGman

P.S. Like my content? Has it helped you out with your AG200? If it has provided value to you and you would like to help me to continue adding content and information, check out my About/Donate page for info on doing just that! Thanks to those that contribute.

Front wheel bearings and other horror stories

Let me tell you a story that I think you will find hard to believe. I find it hard to believe. In fact, if I hadn’t seen it with my own eyes, I wouldn’t believe it. I wouldn’t want to believe it anyway. It’s basically a story about low IQ, and motorcycle ownership with a bit thrown in at the end on how to replace front wheel bearings on your AG200!

A few years ago before the end of the naughties, I was helping out at a small, country Yamaha dealership. The owner was between mechanics and I thought I would help out with the spanners for a few months while he managed to track down another victim, errr employee! For the six months or so I was there, I saw mechanical horrors that no technical person should ever have to see. I still have nightmares to this day…

Things that make you incredulous that we are the dominant species on this planet! Things that make you shudder and doubt that humanity even has the right to go on! There will always be one encounter though, one special “Bobby Dazzler” example of how far someone can push the boundaries of neglect and stand out from the crowd, and man is it a special crowd! It’s one of those things that you wont forget until your final days. Unfortunately this experience for me involved an AG200.

The experience in question started as I was labouring away, minding my own business in the workshop when a guy shows up in his 4WD with trailer in tow. Alarm bells went off before I even got a look at the bike because the poor thing was chucked in the back of the trailer with no restraints. Yep, just tossed in on its side! My idiot detector went off instantly and thought he can unload it himself if he is too pathetic to even load a bike up properly (I never was a good long term employee!). A few minutes later he pushes this poor thing into the shop, leaves his name, address etc. and off he went on his merry way mumbling something about “they don’t make ’em like they used to.”

After he drove off I thought I’d have a look at the treasure he left us to repair. I wish I had taken photographs, I really do wish I did. The guy was complaining about front end problems and boy did he have that! The front wheel bearings had collapsed completely to the point where the ball bearings were gone…completely! Now you can forgive someone for a bit of play in their front end but can you imagine the play this thing had? let me tell you how much movement was in the front wheel; it was hitting the forks!

But wait, it doesn’t stop there dear reader. When the bearings collapse in the front wheel of your motorcycle, you’re going to notice it right? You’re going to think; “Oh, better get that looked at, this thing is getting a bit wonky to ride.” But noooo, not this clown! I don’t know how long he rode it like that but it was long enough for the tyre to wear through the fork legs. Yep, through the fork legs! The Aluminium just under the oil and dust seal was removed right back to the slider on both forks, where it had rubbed the chrome off them as well.

Believe me? I wouldn’t. Unless I had seen it myself with my own eyes, I would find it hard to swallow this story if someone had just told me. I should of taken photos but at the time I think my brain was in some sort of paralysis because of what I was actually seeing. I actually took it for a ride and concluded that it could only be worse if the front wheel had actually fallen off. Diabolical was the only word that I think comes close to how that bike rode with the front end like that.

The whole front end was scrap in my books but the owner insisted that he didn’t need brakes (the hub was all mashed up), or the pesky oil in the forks, slap some new bearings in it and he was good to go! The axle, spacers and inner bearing races were a big, corroded blob of destruction and he screamed at the cost of new, genuine replacements, which I thought were a waste on this moron’s bike anyway. Surprisingly, some new bearings actually fitted and stayed put in the hub, we nicked the other bits off a wrecker and off he went, still bitching at the cost of it all!

I always wanted to “out” this guy as the mechanical terrorist that he is, but what would it achieve? He is still destroying farm equipment to this day and will until he’s in a grave. I always thought, and was taught, that farming was a business. So why don’t farmers treat their equipment as part of their bottom line? It has always baffled me but the answer is probably that a lot of farmers, particularly in the past, never had much concept of  business anyway. Time has caught up with a lot of them. But I digress…

What’s with the story AGman? I thought this post was about front wheel bearings? Well it is but there’s not a lot involved with front wheel bearing replacement so I thought I’d put that entertaining little ditty in there so you will know how to avoid rubbing holes in your fork legs!

Off you go to the Front wheel removal section of my fork repair tutorial. This will give you an idea on how to get the front wheel off and what you have to do to achieve it. Once you have your wheel off and your stolen milk crate ready, place the wheel on it with the brake side facing down. This bearing is easier to knock out because it doesn’t have to pass as far in a press fit as the non-brake, seal side.

Get yourself a long drift or punch and slide it down the centre of the bearing until it reaches the opposite bearing’s inner race. You need a punch in pretty good condition with a good edge so it will hang up on the bearing. A few good whacks with a hammer and it should come out fine along with the centre spacer. Turn your wheel over and you will have much easier access to the opposite bearing which is a bit harder to move because, as mentioned, it has to pass through about double the material before it will drop out of the hub. You can remove the seal before you knock the bearing out but it doesn’t matter, it will come out with the bearing either way.

This is the rough method of removing the bearings. You can get special tools that expand in the inner race of the bearing and then with a slide hammer, you can remove it. Not everyone has easy access to these tools and they can be expensive. I have heard of people using DynaBolts (concrete or sleeve-anchor bolts) to use in bearing removal which is a good idea but may still need a slide hammer if you can’t bash the bolt from the opposite side, which you should be able to do. I will do some experimenting and check it out in an up coming post.

P1020583Back to the job…get yourself a couple of rubber sealed, 6301 bearings. I like SKF and NSK but any of the good bearing brands will do. I also pop the covers off the bearings, flush out the “grease” and replace it with a quality, waterproof substitute. I don’t expect you to do that but if you’re doing big miles on your bike I would defiantly recommend it. While you are at the bearing shop, get yourself a 18x37x7mm seal, they are cheap (as are the 6301 bearings I might add) and you might as well replace it with the bearings.

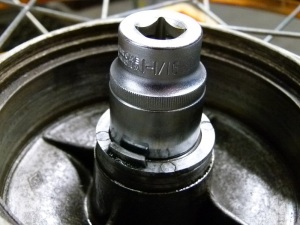
Installation is pretty simple. Find yourself a useless SAE socketP1020577 (American readers are gnashing teeth!) that matches up to the outer race of the bearing but doesn’t hang up on the hub. You can use this to gently tap the bearings into their P1020580new home. Don’t forget the inner spacer! You should also be able to install the new seal nearly by hand, if you do use persuasion, be gentle. Have a look at the photo of the seal below at right. Make sure it’s not flush with the hub. There is a plastic collar that fits on the axle spacer that slightly overlaps the hub a few mm. This helps to keep rubbish out of the seal and therefore the bearing. The link above showing the wheel removal procedure has some good pics if you need them. If this collar is damaged, it should be replaced for the long term health of everything discussed here.

There we have it, use grease on the seal lips, spacers and axle on P1020587reassembly. Make sure the speedo drive lines up correctly or there will be carnage. Another tip is to get someone to hold the front brake lever firmly to centre the hub while you are tightening the axle nut. We are done! Cheap, easy and no excuses for damaging those fork legs!

Cheers

AGman

P.S. Like my content? Has it helped you out with your AG200? If it has provided value to you and you would like to help me to continue adding content and information, check out my About/Donate page for info on doing just that! Thanks to those that contribute.

O’ring chains on the AG200. Really?

Some people that have recent history with the AG200 might be surprised to learn that the first model released way back in ’83 – ’84 was supplied with an o’ring chain for the final drive. What?! Why go to all the trouble of designing a fully enclosed final drive system and then add an o’ring chain? Yamaha must of asked themselves the same question because they stopped doing it not long after the original release. What about now? Is it worth the expense to prolong the life of a component that, if maintained correctly, will last for ages? My thoughts on the matter follow…

Chain gaurdI have some dealer friends who swear by putting o’ring chains inside the chain enclosure of any AG200 that passes through their workshop. If you are a belt and suspenders type of person then I guess you would consider this a good idea. On farms that get chopped up by cattle (deep, sloppy mud) during the winter (Dude…get an ATV!), this is probably a good idea. The factory chain enclosure is great when set up right but it’s not perfect. The lower guard has a drain hole at the lower section and if this part fills with mud and the drain hole blocks then you have a factory chain and sprocket destruction device!

An o’ring chain will not enjoy being operated in a bath of corrosive, abrasive slime but it will last way longer than a conventional chain. So in this sort of environment where people tend to not give the bike even a fleeting glance between times when the bike stops running (known by a lot of farmers as the “service interval”), then I would suggest an o’ring chain a wise investment.

Now for the rest of us…I have never bothered with an o’ring chain on my AG200s because I know how much power conventional o’rings can suck out of a small engine. I don’t know about you, but if I have a bike with less (waaaaaaaay less!) than 20 HP out the back wheel then I don’t want to let any of that go! The AG doesn’t have much horsepower to start with so sucking a little bit out with an o’ring chain wont do it any favours. I also believe if you look after the chain guard properly then it will do nearly as much to protect the chain as any o’ring will.

Some of these new, low friction X ring chains might work better for the AG but once again, vigilance and preventive maintenance, in my opinion, will prevent the need. There is no horsepower to stretch the chain, so if you keep it adjusted, lubed and relatively clean, which the factory enclosure will do, then you are safe with a conventional chain. Spend the money you saved on chain lube and live happily ever after!

Cheers

AGman

P.S. Like my content? Has it helped you out with your AG200? If it has provided value to you and you would like to help me to continue adding content and information, check out my About/Donate page for info on doing just that! Thanks to those that contribute.

Parts listings…more AG200 gold!

Welcome to the new year of 2015, hope ’14 was a good one for you. I thought I would start the new year with a bang by posting up the AG200 parts lists. I have most of them but thought I would link to an older model (1988), and a newer model (2003). This will help you bypass the incompetent Yamaha spare parts guy if you are unfortunate enough to have one in your area! Select your part number and supply him/her with it so they can’t stuff it up!

If you go to Trooper Lu’s online Yamaha parts finder page, You will find that this service pretty much makes having these parts listings redundant. You can find the part you are after, a price and it will show a cross-reference to other models as well…super useful. But some times it’s handy have a listing on your own PC if you are trying to cross reference or you want to pull a single exploded view up to look at something.

Apart from a few new bits on the current AG200 (2013 on-wards), these two parts lists will cover most parts and their numbers. The ’88 manual has the listings for the earlier yellow bikes and the later beige ones, which is handy if you’re after a specific colour part like side covers, guards or a tank.

Enjoy!

2003 AG200 parts list

1988 AG200 parts list

Cheers

AGman

P.S. Like my content? Has it helped you out with your AG200? If it has provided value to you and you would like to help me to continue adding content and information, check out my About/Donate page for info on doing just that! Thanks to those that contribute.

Oil change tips #1.5, aaahh, spare parts guys…

This entry is a bit of an addition to my old Oil Change Tips post I did quite a while ago. Just a bit of updated filter info that I thought I would drop in here to give you guys and girls a heads up. After all these years, I thought mechanics and spare parts guys would have sorted this out but we still have an issue of imparting info from one person to another so we still make catastrophic mistakes like the one I’m about to show you.

TTR250 filterI also own a TTR250, a great bike which has a a long model run with few alterations, like the AG200. Another thing it shares with the AG200 is a nearly identical oil filter, the only difference is four little holes in the relief valve end of the housing. Take a look at the photo at left. Have a reeeeeal good look! You will see what the AG200 would see as our equivalent to methamphetamine; something that will trash your head (see what I did there?). If you put this filter in your AG, you will starve the head of oil and the first thing to grenade is usually the cam will seize in the cam gear side bearing. Not good.

Now, have a look at right. This is what the proper AG200 filter looks like.AG K&N These four little holes are the life-line for oil passing through the filter to get up to the head. If someone has given you a filter that looks like the one above for your AG, TW, XT, TTR230 or old ATV, then slap them! The AG has been around for 30+ years and the TTR250 for 20+ but I still hear stories and read on forums that parts guys and mechanics still mess it up and trash perfectly good engines.

K&N AG Vs TTR250Here is a pic of the other side of the filters and I guess you can understand how people could make the mistake, but I reckon the rubber is blue on the TTR filter for a reason! Yamaha had heaps of issues with this a few years ago, probably when the TTR250 first came out I’d say. So stay vigilant people, especially if you are buying cheap filters off Ebay from people who couldn’t really give a hoot about your bike. But also if you are buying genuine parts from a Yamaha dealer because, to be honest, that where I have heard of most of the stuff-ups happening.

Cheers

AGman

P.S. Like my content? Has it helped you out with your AG200? If it has provided value to you and you would like to help me to continue adding content and information, check out my About/Donate page for info on doing just that! Thanks to those that contribute.

AG200 brake shoes

If you asked me if there was one (there are many!) good reason why to choose the later, electric start AG200s, then it would be because of the larger front wheel and brake. The advantages of the 21″ front wheel won’t be discussed here but the larger front brake and the brake shoe options will be the topic for this post.

Tell me a motorcycle that has a smaller front brake than the back? No idea? Well I can tell you one – the early, 6V, non-electric start AG200. What a gooba of an idea! The wheel and brakes were lifted directly off the AG100 two stroke which in itself was under braked! The shoes were a tiny 110.0 x 25.0mm. One word comes to mind; “inadequate”! It’s one of the few brakes I’ve used on a motorcycle were when you use them you want to put your feet down to give them a hand!

This poor excuse for a brake was used for over ten years by Yamaha on the AG200 until around 1997 when they decided to upgrade the front end with the larger wheel and brake. We now had a whopping 130.0 x 28.0mm brake, we finally caught up with the rear as it has the same dimensions!

So if the dimensions are the same you would think the shoes would be the same right? Well they aren’t, they couldn’t get this right either! But I will excuse Yamaha for this engineering oversight because the front wheel came later and they couldn’t foresee the issues that arouse. Even though the shoes have the same dimensions, the rear units have too much meat on the inside casting to clear the speedo drive housing on the front backing plate. So even though the shoes should fit, they don’t. Two separate part numbers.

AG200 brake shoesCheck out the photo; The front shoes are on the left, the front, pre-electric leg AG200 is in the middle and the rear is on the right. Notice the front has less material in the alloy casting to clear the speedo drive? And you can see that there is a significant upgrade from the old front brake to the new one.

But hang on…if the back don’t fit in the front, do the fronts fit in the back? Do we only need one set of shoes for the AG200? Yes we do. The brakes on the left hand side also fit in the back just fine so we only really need this set of shoes for either end of the bike.

Now that we know what fits we can order a set from our friendly Yamaha dealer right? No…no we can’t/shouldn’t! I won’t even bother listing the Yamaha part number because the last time I went to a dealer I got quoted $75 for a set. This really is crap! And the dealer may not be the one blamed here, he is just trying to make a living (I hope). This is what happens when an importer/national distributor gets greedy. Setting a price that the market will bare rather than what is fair and reasonable. But that’s another blog…

So by all means, give your local dealer a call. Just make sure you’re sitting down when he gives you a price! I feel that no more than $30 should pull it up and you can get them cheaper again if you are prepared to dig a bit deeper. If you want a name brand, after-market set of shoes like Ferodo (FSB733), EBC (506) or SBS (SBS2034) then around the $30 should be about right.

Searching for after-market stuff for the AG can be a minefield because most of this stuff is manufactured for the high volume markets that just happened to not have the AG200 on their model books (like the US). What can also make it difficult is that some higher selling volume countries did get the AG200 but only for a year or two (like the UK). This means they may have a listing but it would only be for the earlier bike, with the smaller brakes discussed above.

Luckily, Yamaha were well known for sharing a lot of consumable parts between models. This helps us to find bits for the AG without getting hammered by Yamaha Australia , who think we are all morons and will just pay up. Come on guys…I can buy Chinese shoes in one-off purchases to suit the AG200, out of the USA for $13. The AG200 is a 30 year old design and this part number goes back even further. My guess is it cost Yamaha $5US to get these things made and they pass them on to us for $75…is that fair? Like I said…it’s another blog!

Anyway, I need to get off my soap-box and give you some useful information. Download the Ferodo Application Guide and check out page 382. You are looking for part number FSB733. This will give you Yamaha equivalent numbers and other manufacturer cross reference. Page 154 will give you the fitments from other Yamaha models and even other manufacturers. This may help if you want to keep an eye out and gamble on buying some old genuine stock that might be going cheap on Ebay or some other location.

I’m getting hints that Ferodo’s part FSB947 is also a replacement for the AG. Page 486 of the catalogue if you want to check it out but I haven’t tried them yet so can’t guarantee their fitment. Will update here when I find out. What I do know is that the FSB733 does fit and I am using them in AG200s now.

Of course the other manufacturers list in this Ferodo catalogue have their listings and information too so there are other potential information sources as well but from the ones I have looked at so far, I have found the Ferodo one the most informative and helpful to date. I will keep up the hunt and if I find something more useful to the AG owner in the future I will make sure to post it up.

There is the other reason I have gone with Ferodo; I can get them, they are a reasonable price, I have used them and they work well. I will be keeping an eye out for any other option though and will update when I get more info.

Cheers

AGman

P.S. Like my content? Has it helped you out with your AG200? If it has provided value to you and you would like to help me to continue adding content and information, check out my About/Donate page for info on doing just that! Thanks to those that contribute.